Most homeowners mistakenly believe roof damage is obvious. The hard truth is that the most catastrophic failures—rot, mold, and structural decay—are invisible until it’s too late.
- A small ceiling stain often signals a problem 10-15 feet away, indicating widespread water travel and hidden decay.
- Improper attic ventilation doesn’t just make your home hot; it actively “cooks” your shingles, slashing their lifespan in half.
Recommendation: Stop looking for obvious flaws. Start thinking like a forensic investigator to diagnose the invisible forces trying to destroy your roof from the inside out.
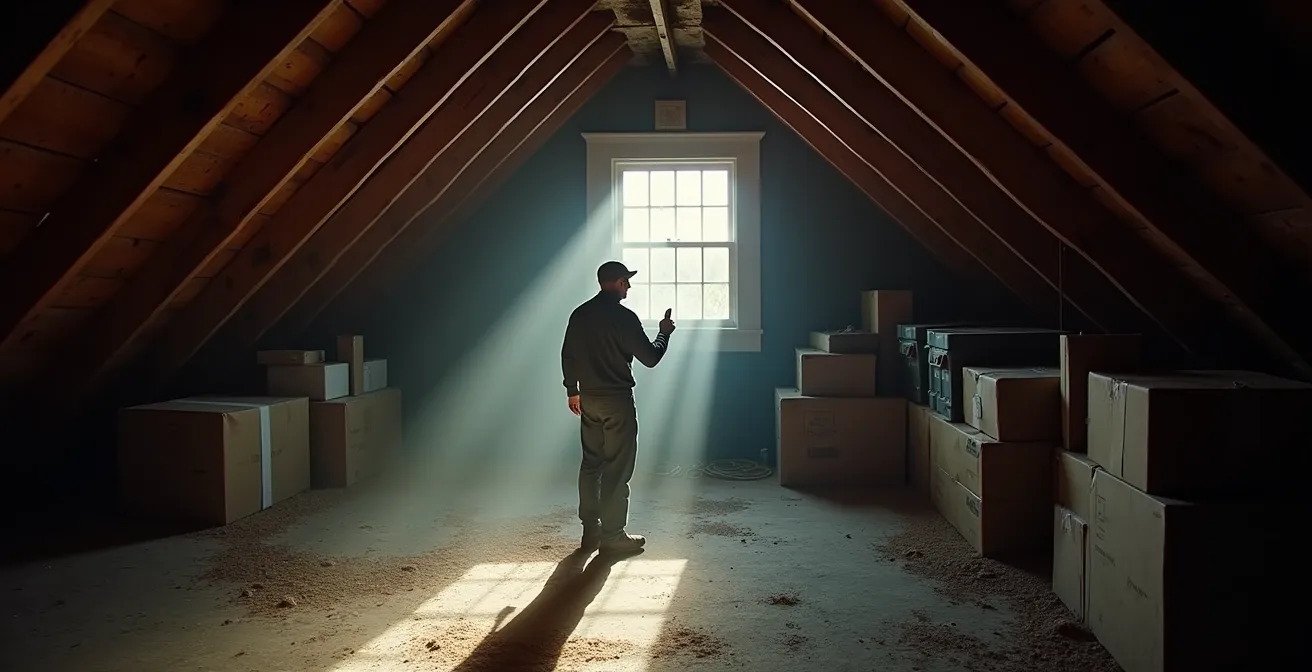
You see it one morning. A faint, brownish circle on the ceiling in the corner of a bedroom. Your first thought is that it’s a small, isolated leak. A quick patch job, maybe. But as a roofer with decades of experience, I can tell you that this is rarely the case. That small stain is not the problem; it is the final symptom of a much larger, more sinister issue that has likely been developing for months, or even years. The common advice—to look for curled shingles or clean your gutters—is dangerously inadequate for a roof over 15 years old. It’s like telling someone to check their tire pressure after the engine has seized.
The real fight to protect your home’s envelope and its resale value happens on a battlefield you can’t see. It’s a war against insidious water travel, hidden heat traps that bake your roof from within, and the slow, brittle death of aging materials. Most homeowners lose this war because they don’t know the enemy. They call a roofer for a “leak,” but what they really have is a systemic failure in their roof’s defense system. This failure is what turns a minor concern into a nightmare of torn-out insulation, mold remediation, and unexpected structural repairs.
Forget the simple checklists. This guide will teach you to see your roof through the eyes of a professional. We’re not just going to point out signs of damage; we’re going to dissect the mechanics of failure. You’ll learn why a small stain is a red flag for a five-figure problem, how to evaluate roofing materials based on their 30-year lifecycle cost, not just their upfront price, and how to spot the critical ventilation error that destroys your roof from the attic up. By the end, you won’t just see a roof; you’ll understand it. And that understanding is the only real protection you have.
This article provides a complete diagnostic roadmap. We will cover the hidden costs of minor leaks, compare long-term material investments, and reveal the professional secrets to vetting a contractor and identifying the true source of water intrusion. Follow this guide to protect your most valuable asset.
Summary: A Homeowner’s Roadmap to Identifying Critical Roof Flaws
- Why a Small Ceiling Stain Often Indicates a $5,000 Roof Problem?
- Asphalt Shingles vs. Metal Roofing: Which Is Cheaper Over a 30-Year Lifespan?
- How to Vet a Roofing Contractor to Avoid scams and Shoddy Work?
- The Ventilation Error That Cooks Your Shingles From the Inside Out
- When to Patch vs. When to Replace: The 3 Factors That Decide Your Strategy
- How to Estimate the Solar Yield of Your Commercial Roof in 10 Minutes?
- The Caulk Mistake That Lets Moisture Rot Your Window Sills
- Window and Door Replacement: How to Cut Your Heating Bill by 20% This Winter?
Why a Small Ceiling Stain Often Indicates a $5,000 Roof Problem?
That small, discolored spot on your ceiling is a liar. It’s a pinprick on a map that hides a vast, waterlogged territory. Homeowners assume water takes the shortest path from the roof to the ceiling. This is a critical, and expensive, misunderstanding. In reality, water is a patient traveler. It can penetrate a nail hole or a cracked shingle, hit the roof deck, and then travel horizontally along a rafter or the underside of the decking for 10 to 15 feet before it finds a place to drip. By the time you see the stain, the water has already saturated a large, hidden area of wood, insulation, and potentially compromised the roof’s structural integrity.
This is the concept of forensic triangulation. The stain is just Point A. The water’s entry point, Point B, is somewhere else entirely, often far “uphill” on the roof slope. A forensic analysis of roof failures confirms this gap between the symptom and the cause. That journey between points A and B is where the real damage accumulates. It’s the silent soaking of decking, the slow growth of mold on unseen surfaces, and the rot that weakens the bones of your home. This is precisely why a seemingly minor issue can quickly escalate.
Make no mistake: you are not paying to fix a stain. You are paying for the consequences of that hidden water travel. A professional repair isn’t just about replacing a few shingles. It often involves tearing out and replacing sections of the roof deck, discarding and installing new insulation, and performing professional mold remediation. This is how a small visual cue leads to repair bills that, according to industry data, can easily reach $3,000 to $6,000 for extensive roof leaks. The stain isn’t the problem; it’s the final invoice arriving long after the damage has been done.
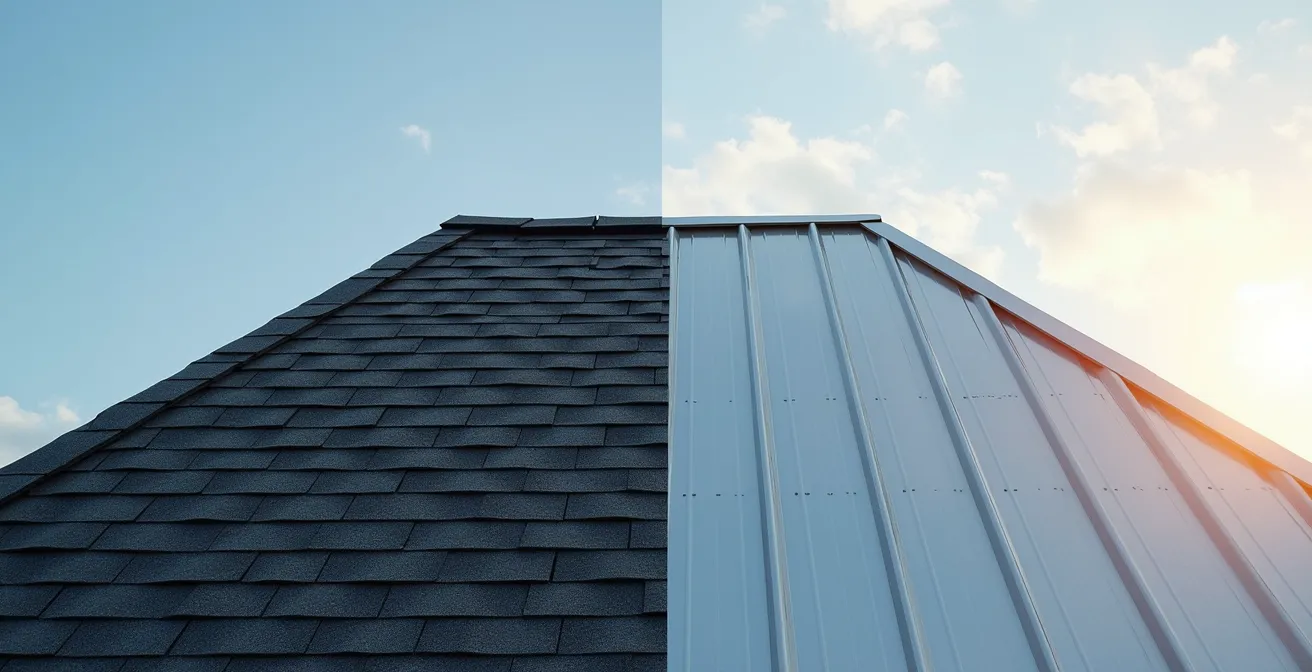
Asphalt Shingles vs. Metal Roofing: Which Is Cheaper Over a 30-Year Lifespan?
When it’s time for a roof replacement, the most common mistake homeowners make is focusing on the initial installation price. An asphalt shingle roof might seem like the cheaper option upfront, but over the 30-year lifespan of a typical mortgage, that “savings” can evaporate and even reverse. A strategic decision requires looking at the total lifecycle cost, which includes not just installation but also maintenance, repairs, energy savings, and insurance premiums. This is where the true value of different materials is revealed.
Asphalt shingles are the standard for a reason: they offer a decent service life of 20 to 30 years at a lower initial cost. However, they are vulnerable to weathering, require more frequent maintenance for things like replacing blown-off shingles, and offer minimal energy efficiency. Metal roofing, on the other hand, demands a higher initial investment but provides a far superior long-term return. With a lifespan of 40 to 70 years, it will almost certainly outlast an asphalt roof, often by a factor of two or three. It requires virtually no maintenance and its reflective properties can significantly reduce cooling costs.
Furthermore, many insurance companies recognize the superior durability and fire resistance of metal by offering premium reductions of up to 35%. When you factor in avoiding a second full roof replacement within 30 years, the financial argument becomes overwhelmingly clear. The choice isn’t just about what covers your house today; it’s about which investment will better protect your finances for decades to come.
This comparative data, as presented in a lifecycle cost analysis, is critical for any homeowner making a long-term investment. The table below breaks down the 30-year financial reality of both options.
| Cost Factor | Asphalt Shingles | Metal Roofing |
|---|---|---|
| Initial Installation | $3.50-$12/sq ft | $5-$20/sq ft |
| Lifespan | 20-30 years | 40-70 years |
| Insurance Premium Savings | None | 10-35% reduction |
| Energy Efficiency | Standard | 25-40% cooling savings |
| Maintenance (30 years) | $3,000-$5,000 | $500-$1,500 |
| Replacement Needed | 1-2 times | 0 times |
How to Vet a Roofing Contractor to Avoid scams and Shoddy Work?
The most durable roofing material in the world will fail if it’s installed improperly. Your choice of contractor is more critical than your choice of shingle. In this industry, shoddy work and outright scams are common, especially after a storm when “storm chaser” companies appear. Vetting a contractor goes far beyond asking for a license and insurance. You must dissect their quote to see if they are a true professional or just a salesperson. A proper quote is a detailed blueprint for the project, not a one-line price tag.
A legitimate roofer’s quote will have an obsessive level of detail. It won’t just say “replace flashing”; it will specify which flashing will be replaced and with what materials. It won’t just mention “underlayment”; it will name the specific brand and weight of the synthetic underlayment being used. Most importantly, it will include a clear, written protocol for handling unexpected problems, such as the discovery of rotted decking, with a pre-agreed cost per square foot. This single line item separates the professionals from the amateurs. Without it, you are vulnerable to exorbitant surprise charges mid-project. Also, be aware that while material costs are fixed, $50 to $150 per hour for professional roofing labor is a typical range, which should be reflected in the detailed estimate.
Do not be swayed by a low price. A cheap quote is often a sign of corners being cut. The details they omit are where your future problems will come from. Use the following checklist as a litmus test for every quote you receive. If a contractor cannot provide these details, do not hire them. Period.
Your Contractor Quote Litmus Test
- Exact underlayment specified: Demand the specific product name and weight (e.g., “GAF FeltBuster® High-Traction Synthetic”), not just a generic term like “felt paper.”
- Flashing protocol: The quote must detail a full flashing replacement plan (step, counter, and valley flashing) with materials listed (e.g., “new .019-gauge aluminum”). Reuse is a red flag.
- Cleanup and disposal: Look for a specific line item for dumpster rental and a commitment to daily site cleanup, including magnetic sweeps for nails.
- Rotten decking contingency: A non-negotiable clause stating the exact cost per sheet or square foot for replacing any unforeseen rotten roof decking.
- Workmanship warranty details: The quote must clearly differentiate the manufacturer’s material warranty from the contractor’s own transferable workmanship warranty, specifying its length and terms.
The Ventilation Error That Cooks Your Shingles From the Inside Out
One of the most destructive forces acting on your roof is completely invisible: trapped heat in your attic. Many homeowners, and even some inexperienced roofers, believe that more ventilation is always better. They add an extra exhaust vent, thinking it will help cool the attic. This is a catastrophic mistake. A properly ventilated attic is a balanced system, relying on the “chimney effect”: cool air is drawn in through soffit vents (low on the roof) and hot, moist air is pushed out through ridge or gable vents (high on the roof). When this system is unbalanced—typically with too much exhaust and not enough intake—it creates a negative pressure environment.
This negative pressure acts like a powerful vacuum. It begins to suck conditioned air from your living space up into the attic, pulling your heating and cooling dollars right through the ceiling. Worse, it superheats the attic space, with temperatures easily soaring over 150°F (65°C). This extreme heat literally bakes your shingles from the underside. The asphalt in the shingles becomes brittle, they lose their protective granules, and their lifespan is dramatically shortened. A professional inspection often reveals that this thermal curse can reduce a 30-year shingle’s life to a mere 10-15 years.
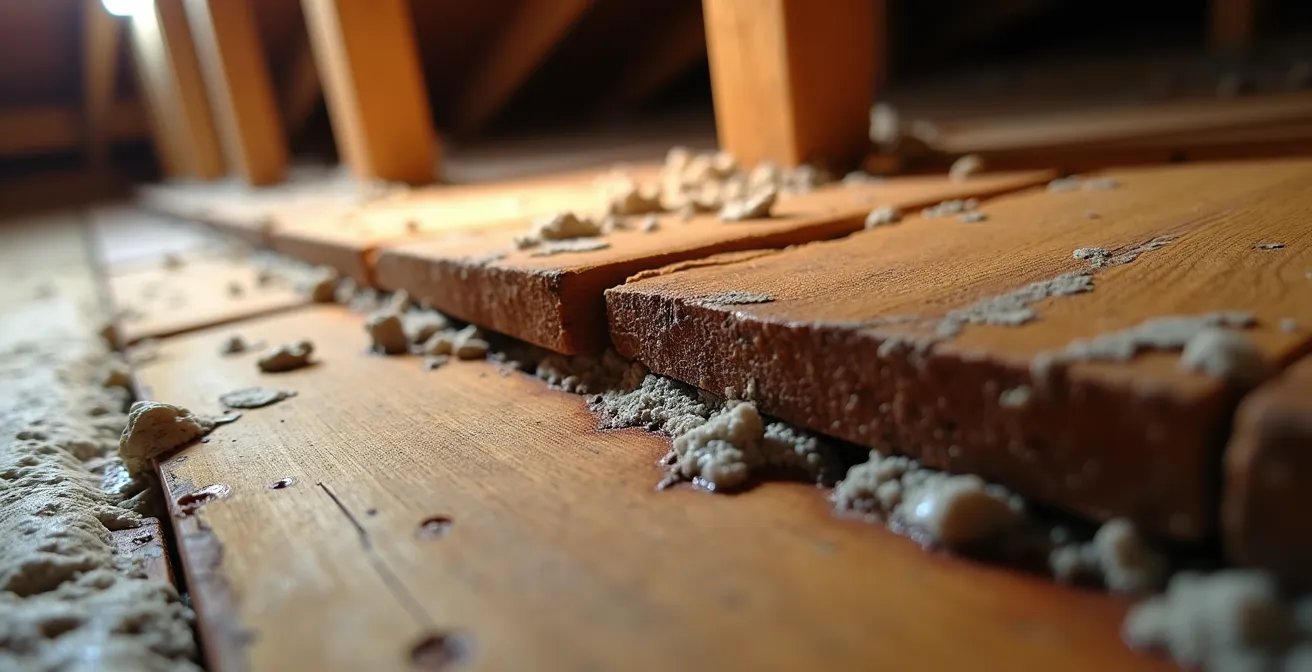
The damage doesn’t stop there. As hot, moist air gets trapped, it condenses on the cooler surfaces of the roof decking and framing, especially during temperature swings. This chronic moisture leads to fungus, delamination of the plywood decking, and eventually wet rot decay in the hidden roof timbers. What began as a simple ventilation imbalance becomes a full-blown structural crisis. Your roof isn’t just failing; it’s being actively cooked and rotted from the inside out.
When to Patch vs. When to Replace: The 3 Factors That Decide Your Strategy
When you have localized damage, like a few missing shingles after a windstorm, the immediate question is whether to patch or replace. The answer has less to do with the size of the damaged area and more to do with the overall health and age of your roofing system. A patch is a temporary fix, a bandage. A replacement is a cure. Choosing a bandage when you need a cure is a costly delay of the inevitable. The decision hinges on three key factors: age, the extent of the damage, and most importantly, material brittleness.
If your roof is under 10 years old and the damage is confined to a small, specific area, a professional patch is a reasonable and cost-effective solution. However, if your roof is approaching the end of its warrantied life (15-20+ years for asphalt), patching is often a fool’s errand. The shingles surrounding the patch are just as old and brittle as the ones that failed. A new patch on an old roof creates a stress point; the new, flexible shingles will not move and expand at the same rate as the old, brittle ones, often leading to new leaks around the patch. The financial numbers are stark: while a simple fix might be tempting, the $1,155 average repair cost is wasted money if a full replacement, often costing $8,000 or more, is required just a year or two later.
The definitive test is the brittleness test. An experienced roofer can tell the health of a shingle by touch. You can perform a simplified version yourself. On a warm, sunny day, gently lift the edge of a shingle. If it feels stiff, cracks, or breaks instead of flexing, it has lost its essential oils and flexibility. It is brittle. If one shingle is brittle, the entire roof is brittle. At that point, any money spent on patching is money thrown away. The roof has reached the end of its functional life, and replacement is the only sound financial and structural strategy.
How to Estimate the Solar Yield of Your Commercial Roof in 10 Minutes?
While the title mentions commercial roofs, there’s a powerful lesson here for any homeowner considering solar panels: a solar quote can serve as an unwitting, high-stakes roof inspection. Reputable solar installers have a vested interest in your roof’s health. They are mounting an expensive system that they often warranty for 25 years. They absolutely will not install that system on a roof that is structurally unsound or nearing the end of its life. Their business model depends on it.
Before they even think about solar yield, their team conducts a thorough structural assessment that is, in many ways, more rigorous than a standard roof inspection. They are looking for specific red flags that would jeopardize their installation. They check for any signs of sagging or deflection in the roofline, which indicates potential rot or water penetration in the decking. They evaluate the integrity of the underlying framing to ensure it can handle the additional load of the panels, especially snow load in colder climates.
Most importantly, they have a strict age cutoff. No professional solar company will proceed with an installation on a roof that has less than 10-15 years of remaining functional life. To do so would mean their system would have to be removed and reinstalled when the roof inevitably fails, a massive cost they are unwilling to bear. Therefore, their assessment provides a valuable, unbiased second opinion on your roof’s true condition. If a solar company gives your roof a green light, it’s a strong sign of its structural health. If they refuse to install or demand a replacement first, you should listen. They are essentially giving you a free, expert-level diagnosis of your roof’s remaining lifespan.
The Caulk Mistake That Lets Moisture Rot Your Window Sills
You’ve checked the shingles, inspected the attic, and can’t find the source of a persistent leak. Before you spend thousands on a roof repair that might not work, look lower. One of the most common diagnostic errors is mistaking a window, door, or wall leak for a roof leak. Water that enters through a failed caulk joint around a window can travel down the wall framing and appear on a ceiling or wall far from the entry point, perfectly mimicking a roof issue.
The most common culprit is old, cracked caulk around window frames. Caulk is not a permanent solution; it’s a maintenance item that breaks down under UV exposure and temperature changes. When it fails, it creates a direct channel for rainwater to enter your wall assembly, where it soaks insulation and rots wooden sills and framing. Spending money on a roof repair for this problem is completely ineffective. The cost to fix the resulting interior issues, such as $300 to $1,000 for ceiling water damage, is just the beginning if the true source isn’t identified.
To avoid this costly misdiagnosis, you must perform a systematic water test. Do not simply blast the whole wall with a hose. This will only confuse the issue. Start low and work your way up. Using a garden hose on a low-pressure setting, saturate the area around the bottom of the window sill for 5-10 minutes while a helper watches for water intrusion inside. If no water appears, move up to the sides of the window, then the top. Finally, test the roof edge and wall section above the window. By isolating each potential entry point, you can pinpoint the exact failure point. This simple diagnostic test can save you from an unnecessary and expensive roof replacement by proving the leak is coming from an entirely different system.
Key Takeaways
- Invisible Forces are the Real Enemy: Water travel, heat traps, and material brittleness cause more damage than visible flaws.
- Think in Lifecycles, Not Upfront Costs: A cheap roof today is often an expensive replacement tomorrow. Analyze the 30-year cost.
- Your Contractor’s Quote is a Blueprint: A lack of detail on underlayment, flashing, and contingencies is a major red flag for shoddy work.
Window and Door Replacement: How to Cut Your Heating Bill by 20% This Winter?
The promise of cutting your heating bill with new windows and doors is compelling, but it’s a promise that a failing roof can completely negate. Your home’s energy efficiency is an interconnected system, and your attic insulation is the primary barrier against heat loss in the winter. A compromised roof attacks this barrier directly. Even a small, slow leak that you might not even notice will persistently drip onto your attic insulation.
Once insulation gets wet, its thermal resistance (R-value) plummets. Fiberglass and cellulose insulation, when damp, compress and lose the trapped air pockets that give them their insulating power. It’s like wearing a wet sweater in the winter—it no longer keeps you warm. This creates a massive thermal bridge, a highway for your home’s heat to escape directly into the cold winter air. You can have the most advanced, energy-efficient windows in the world, but if your attic insulation is a wet, compressed mat, you are still throwing money out the roof.
The final cost of a neglected roof leak is rarely the roof repair itself. It’s the cascade of secondary damage. Wet insulation is a breeding ground for mold and must be completely removed and replaced. This is a labor-intensive job that, according to restoration data, requires a full tear-out and replacement at a cost of $1.50 to $2.50 per square foot for saturated insulation. For a standard 1,000-square-foot attic, you are looking at an additional, unexpected bill of thousands of dollars, all because a small leak was not addressed. Your heating bills will remain stubbornly high until both the roof leak is fixed AND the compromised insulation is replaced. A healthy, dry roof is the foundation of an energy-efficient home.
Your roof is your home’s first and most important line of defense. Do not wait for a stain on the ceiling to tell you it has failed. Be proactive. Use this knowledge to perform an informed inspection of your property. If your roof is over 15 years old or you see any of the red flags discussed, schedule a professional assessment immediately. A small investment in a professional opinion today is your best defense against a catastrophic expense tomorrow.